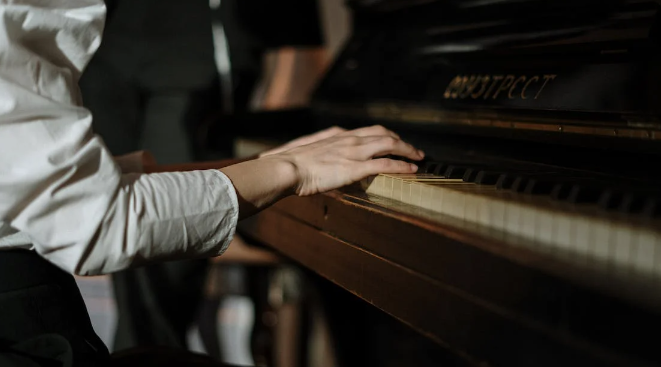
When it comes to blues piano, the left hand plays a crucial role in setting the rhythm, groove, and feel of the music. Whether you’re playing slow blues, boogie-woogie, or shuffle blues, your left hand serves as the engine that drives the music forward. Mastering a variety of left-hand patterns and riffs allows you to develop your own style while keeping a solid foundation for improvisation and right-hand melodies.
This article dives into the essential left-hand techniques, patterns, and riffs every blues pianist should know — from basic shuffle patterns to walking bass lines and driving boogie-woogie progressions.
Why the Left Hand Matters in Blues Piano
The left hand in blues piano is all about feel and rhythm. It creates:
- The foundation for the right hand’s melody and improvisation.
- The rhythmic groove that propels the song forward.
- The harmonic framework (chords) on which the melody is built.
Because blues often relies on small group or solo performance settings, especially in its early forms, pianists often had to cover both the bassline and harmony in the left hand. That’s why left-hand mastery is so critical in this style.
Common Blues Left-Hand Patterns
1. The Shuffle Pattern
One of the most iconic left-hand patterns in blues is the shuffle pattern. It’s a swinging, rolling pattern that alternates between the root and the fifth or sixth of the chord.
In C (basic shuffle)
| Beats | Notes |
|---|---|
| 1 | C – G |
| 2 | C – A |
| 3 | C – G |
| 4 | C – A |
This pattern creates a lilting swing feel, the hallmark of classic slow and medium-tempo blues. You’ll apply this same concept to the IV chord (F7) and the V chord (G7).
Pattern for F7
| Beats | Notes |
|---|---|
| 1 | F – C |
| 2 | F – D |
| 3 | F – C |
| 4 | F – D |
Pattern for G7
| Beats | Notes |
|---|---|
| 1 | G – D |
| 2 | G – E |
| 3 | G – D |
| 4 | G – E |
This shuffle feel is essential for slow and mid-tempo blues songs.
2. Boogie-Woogie Walking Bass
If you’re aiming for something faster and more driving, you can use a boogie-woogie walking bass line in the left hand. This pattern moves up and down the chord tones with a steady, chugging rhythm.
Basic Boogie in C
| Beats | Notes |
|---|---|
| 1 | C – E |
| 2 | G – A |
| 3 | Bb – A |
| 4 | G – E |
This gives your left hand a constant rolling motion, perfect for uptempo blues and rock and roll.
You can adjust the walking bass for F7 and G7 by following the same pattern but starting on F or G.
Pattern for F7
| Beats | Notes |
|---|---|
| 1 | F – A |
| 2 | C – D |
| 3 | Eb – D |
| 4 | C – A |
Pattern for G7
| Beats | Notes |
|---|---|
| 1 | G – B |
| 2 | D – E |
| 3 | F – E |
| 4 | D – B |
This boogie feel works beautifully for faster blues, especially boogie-woogie tunes.
3. Walking Bass Line (Jazz-Influenced Blues)
A more jazz-influenced walking bass line involves connecting the chords with stepwise motion. This works well for slower or medium swing blues, giving a more melodic and flowing bass line.
Walking Bass for C7 (12-bar blues)
| Bar | Notes |
|---|---|
| 1 | C – E – G – A – Bb – A – G – E |
| 2 | C – D – E – F – F# – G – G – A |
| 3 | Bb – A – G – E – C – D – E – F |
| 4 | G – E – G – A – Bb – A – G – E |
Moving to F7
| Bar | Notes |
|---|---|
| 5 | F – A – C – D – Eb – D – C – A |
| 6 | F – G – A – Bb – B – C – D – Eb |
This kind of walking bass is more challenging but extremely effective in blues with jazz influences, like Chicago blues.
4. Basic Drone or Chord Stabs
If you’re just starting out, you can use simple chord stabs or root note drones in the left hand. This works especially well for slow blues, where you want to leave a lot of space.
Example (Key of C)
| Beats | Notes |
|---|---|
| 1 | C7 (whole chord) |
| 2 | Rest |
| 3 | C7 (whole chord) |
| 4 | Rest |
This leaves space for the right hand to improvise, while keeping the left-hand rhythmic pulse intact.
Combining Left-Hand Patterns with Right-Hand Improvisation
Once you feel comfortable with your left-hand patterns, you can begin adding right-hand riffs and licks. The blues scale is your best friend for right-hand improvisation.
C Blues Scale
C – Eb – F – F# – G – Bb – C
Play a left-hand shuffle and experiment with simple licks, such as:
- C – Eb – F – G – F – Eb – C
- G – F – Eb – C
The contrast between the steady left hand and the improvised right hand is the key to authentic blues.
Developing Muscle Memory
Since the left hand often plays repeating patterns, it’s crucial to develop muscle memory. This means practicing your left-hand patterns slowly and repeatedly, until you can play them without thinking.
Try practicing your left-hand patterns alone, then adding simple right-hand notes. Even a few single notes can add plenty of character when the left hand drives the rhythm.
Adding Turnarounds
A turnaround is a short riff or chord sequence at the end of the 12-bar form that brings you back to the top. Turnarounds often happen in bars 11 and 12 and can be played with both hands, but the left hand can carry a big part of it.
Simple Turnaround in C
| Bar | Notes |
|---|---|
| 11 | C – E – G – A – Bb – A – G – E |
| 12 | C – G – A – Bb – A – G – F – E |
Turnarounds are signature moments in blues playing — they add flair and signal the loop back to the top.
Final Tips for Blues Left-Hand Mastery
- Keep it steady — Rhythm is king in blues piano.
- Start slow — Speed comes naturally once your patterns are solid.
- Listen to the masters — Pianists like Otis Spann, Pinetop Perkins, and Professor Longhair were left-hand wizards.
- Experiment — Mix and match patterns to create your unique groove.
Mastering left-hand patterns and riffs in blues piano is about more than just technique — it’s about capturing the groove, feel, and storytelling spirit of the blues. Whether you favor simple shuffle patterns, driving boogie-woogie lines, or more intricate walking bass riffs, your left hand holds the key to unlocking authentic blues piano playing.
The best way to get better is to play along with recordings, jam with other musicians, and most importantly — have fun. The blues is all about expressing yourself, and your left hand is the foundation for all of it.
The written content on this page was generated by perplexity.ai